How to Build the Blog Page of Your Website Using WordPress (For Websites Hosted on Namecheap)
If you intend to employ content marketing as one of your lead-generation strategies, you will need a blog. A blog is where you publish articles, guest posts, promotional content, updates on new releases, as well as upgrades on your products.
However, creating a blog is expensive and difficult. I have built one from scratch. So this is coming from experience. Again, Building blog sites can be time-consuming.
But you can get a blog from Open-source Content Management Systems like WordPress.
This article explains how you can build the blog page of your website using WordPress. The article assumes that you have already built and deployed your website to the cloud, and now wish to add a blog section to the website.
For specificity, this article focuses on websites hosted with Namecheap. However, several other hosting platforms including Godaddy are also compatible with WordPress. So you can use them.
But before we proceed, why do you even need a blog on your website?
Why You Should Add a Blog Section to Your Website?
A Blog is important in so many ways including the following:
Publishing on your blog drives traffic to your website. This is more effective if you link your blog appropriately to your home, landing, or product page.
A blog helps you to generate more leads. If you publish content tailored to your target audience, you can generate high-quality leads for your sales team through your blog. These leads can be converted to sales.
A blog may serve as a medium for publishing important news, announcements, upgrades, or updates about your business.
Publishing industry-relevant content on your blog can help you to build authority in your niche.
Publishing on your blog helps you to optimize your website for search engines. This can attract inbound leads to your business.
You can publish educational content on your blog. This may also serve as part of your content marketing strategy.
A blog may serve as an additional revenue channel for your business. You may subscribe to Google AdSense or AdWords, or even publish paid Ads for direct clients if the blog commands significant traffic.
Now that we have understood the importance of a blog, how do you add one to your website?
How to Add a WordPress Blog to Your Website
This section discusses how to add a WordPress blog to a website. To make it easier to understand, we will use Namecheap as the hosting platform.
Log into your NameCheap Dashboard.
Log into your Cpanel.
Use the Softaculous Apps Installer under “exclusive for namecheap customers”
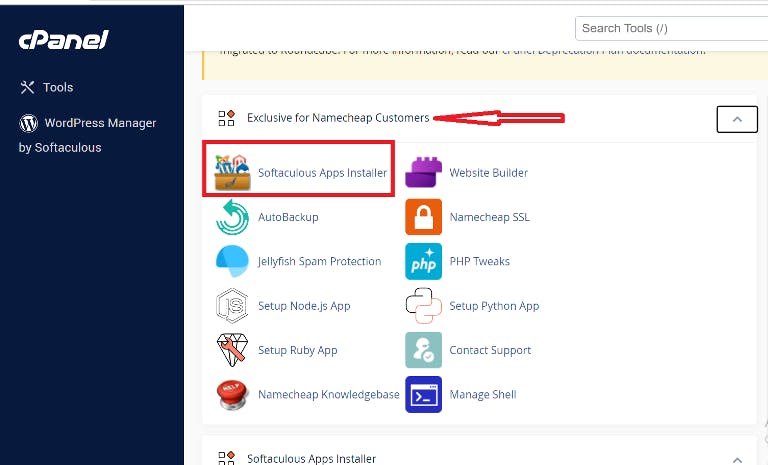
Or scroll down straight to the Softaculous App installer and click WordPress under scripts.
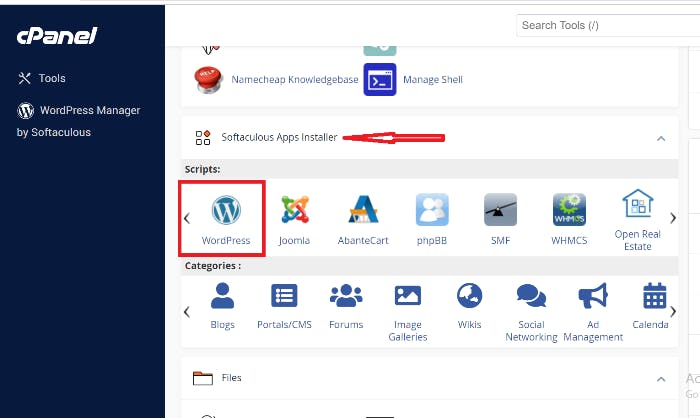
Click Install
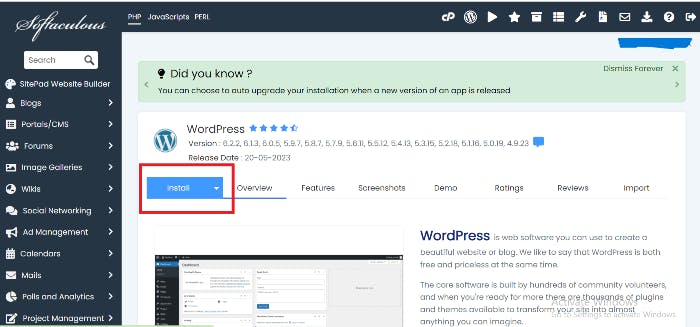
Set the url of your blog:
Under protocol, select https://. HTTP stands for HyperTest Transfer Protocol. It is the protocol used by the internet to serve web pages using links. In other words, communication between users’ PC and web servers occurs by sending HTTP requests and receiving HTTP responses. The “S” at the end signifies that the URL is secure for web communications.
Under domain, choose your top level domain. Your top level domain (TLD) is your main website. For example, mywebsite.com.
Leave directory empty. However, in the Directory field you can specify the root folder for WordPress installation. By default, this field is empty, and it allows installing WordPress on your main website (eg mywebsite.com) directly. But, if you wish to install WordPress to a subfolder, like mywebsite.com/blog, simply type "blog" in this field.
Set site name to Blog.
Set site description. The description should contain any relevant information about your blog. For instance, the purpose of the blog can go into the description.
Set your Admin Username and password. You will use these details to log into your Admin dashboard subsequently.

Under Plugins, check the plugin you may need in your blog. I selected loginizer to limit login attempts. I also selected Classic editor, which is my favourite WordPress editor. The classic editor allows you to edit my articles easily.
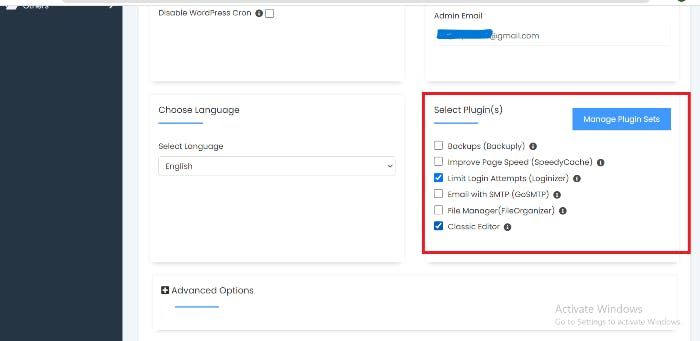
Scroll down, insert your email where your installation details will be sent and click install. Clicking the button installs WordPress.
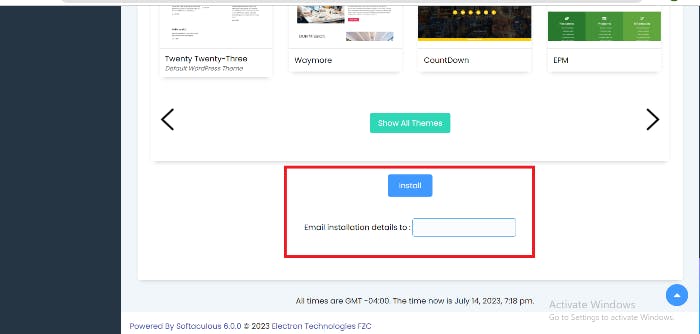
Then log into your WordPress dashboard by adding /wp-admin or /wp-login.php at the end of your blog URL. For instance, “mywebsite.com/blog/wp-admin”. Once the log-in page opens, sign up using the username and password you set earlier.
Go to settings > general settings

Select suitable options for site language, Time zone, Date format, and time format.
Save changes.

Select permalinks under settings. Permalinks help you to set how the URLs in your blog pages will appear.
Choose your permalink structure. The most common is the Post name structure. This will set your URL based on the title of the post. For instance, if you write a post titled “The Importance of Content Marketing,” your URL will be mywebsite.com/blog/the-importance-of-conten...

Choose other options and save changes.
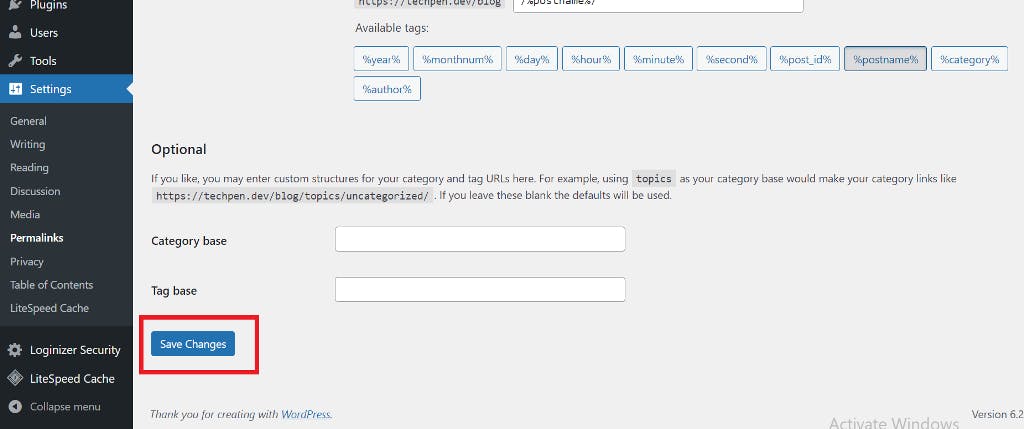
Go to appearance to give your blog the feel of your website. Select editor to change the color and arrangement of your blog in line with how your website looks.
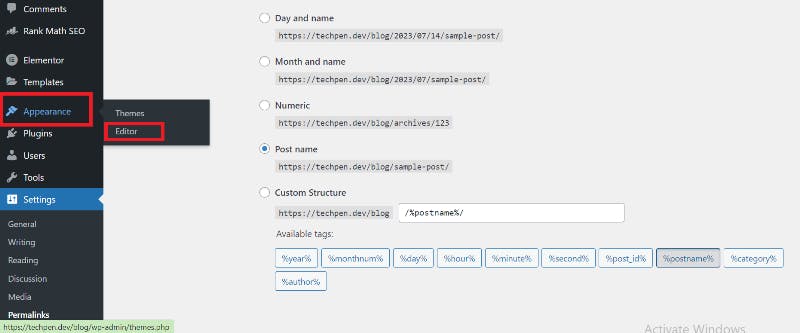
Then select templates.
Click on your blog in the pan provided. This brings a panel where you can change the background color, padding, margin, add links of the blog.
If the background color of your website is blue, it is reasonable to set the background color of your blog page to blue.
You can edit the entire template of your blog or edit your blog block by block.
While editing the blocks, you can also set the text color, the background color, and colors of the links inserted to your blog. You can also set the font details of your blog under typography.
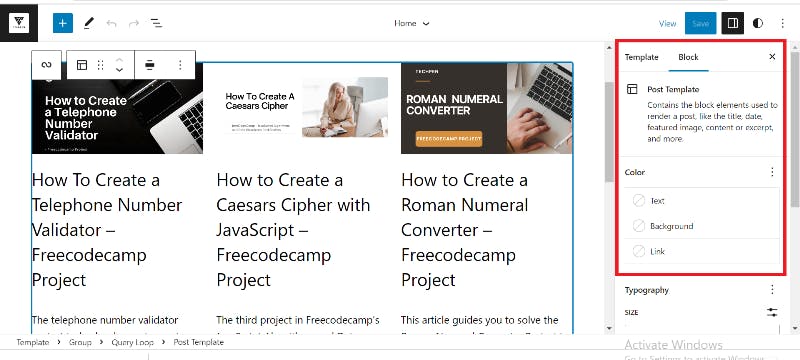
Go to styles > Layout and set the layout of your blog.
In the layout, you can set features like content width, height, and padding.

Edit the html of your site's code using your code editor (visual studio code, etc). Create a blog menu and add a link pointing to the URL of the blog (which you selected in the site settings). For instance, in your HTML Nav Bar, create a tab and add the link to your blog. For instance: <a href="mywebsite.com/blog">Blog</a>.
Save your HTML and update your files on your hosting platform. You can use FileZilla to do this.
Closing Thoughts
WordPress is open-sourced and some features can be modified at any time. Hence, I would like to hear from you.
Try these steps and see if there are any differences, if you’re stuck in any step, or if there are places you would want me to explain further. Let me know in the comment section. I promise to attend to all your concerns and comments.
